- Home
- Easy Crafts
- Embossing
Easy Crafts for Kids - Project 1
We learn: How To Emboss
In Easy Crafts for Kids 1, we explore a technique called: EMBOSSING
In this project we show you how you can easily make a great embossed work of art with a steampunk gear theme, using everyday items found in and around the home.
We learn to emboss art paper which makes this project a Paper Craft.
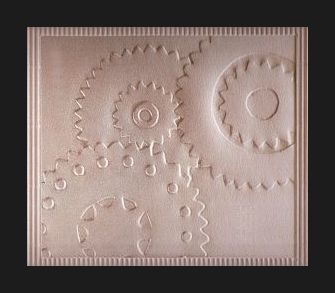
WHAT YOU WILL NEED:
- 2 x A4 or Letter sheets of cardboard to cut out some shapes.
- One sheet of art paper in silver, gold or any other metallic color, alternatively you can use tin foil. We'll use this to rub our cardboard design onto.
- A pair of compasses (or any type of objects to draw different sizes of circles) to create the design. You can also print circle templates on cardboard and cut those out.
- A craft knife, paper punch, glue and a teaspoon.
OPTIONAL ITEMS:
- A sheet of corrugated or textured paper for a frame.
- If you are too young to handle a craft knife, ask someone older to do the inside bits of the frame template with a craft knife for you. The outer areas can be cut with a pair of scissors.
- Pinking shears are scissors with saw-toothed blades instead of straight blades. They produce a zigzag pattern instead of a straight edge. You can use this to cut around the edges of the circles to make it easier.
OTHER IDEAS:
This easy kids craft technique can also be used to make Valentine's, Birthday, Christmas, Mother's or Father's Day and other special occasion cards with hearts, balloons, a Christmas tree, or any other simple shapes that you can find.
You can also use simple flower shapes to make striking wall art that can hang together in pairs.
This project can be adapted for any age using simpler or more detailed shapes and designs.
Perfect for holidays, school, family fun crafts, camps, rainy day activities. The possibilities are endless, you can also incorporate other textures like dimensional paints and more to add additional color to the end product. One of our visitors created this project and added an additional tiny white dot pattern with a paint pen inside and outside some of the circles, which looked beautiful!
FOLLOW THE 9 EASY EMBOSSING STEPS BELOW:
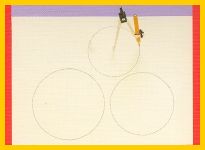
1. Use a pair of compasses to draw three circles on one piece of cardboard. Make each one a slightly different size.
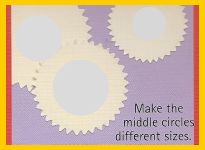
2. Draw a zigzag edge around each circle and a plain circle in the middle of each one. Cut around the zigzag lines. Or use pinking shears.
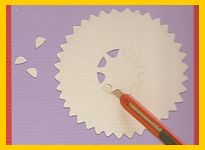
3. In the middle of the largest circle, draw curved shapes. Then, carefully use a craft knife to cut them out.
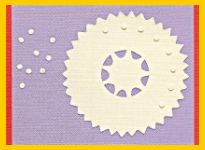
4. Use a hole puncher to punch holes in some scraps of cardboard. Open the puncher and glue the punched circles around the edge.
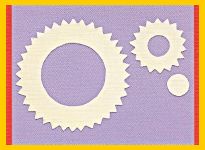
5. Cut the middle out of one of the other circles and cut a zigzag line around it. Then, cut a circle out of its middle.
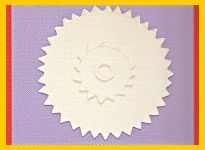
6. Glue another zigzag edge circle onto the remaining circle. Cut out a ring of cardboard and glue it in the middle.
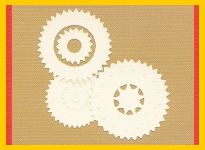
7. Lay all the pieces onto the second piece of cardboard. Arrange them in an overlapping pattern, then glue them on.
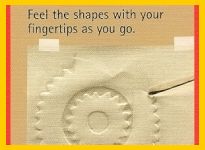
8. Tape a piece of art paper over the circles. Use the end of a smooth teaspoon to press and rub around the edges of the cardboard shapes.
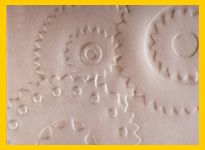
9. Continue pressing around the shapes until you have revealed all the shapes. Your piece is ready to frame, any way you choose.

10. This one has a layered corrugated cardboard frame that we've cut out to add more texture. Placed in a dark wooden frame.
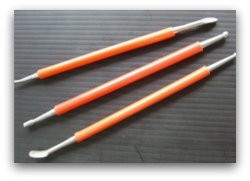
Like EMBOSSING? These are EMBOSSING TOOLS, if you like this craft you might want to purchase a set the next time you visit your local Arts & Crafts Store. It helps to rub patterns out with a lot more precision and less chance of damaging the paper.
Amazon is a great place to shop for craft supplies. Not only will you find craft supplies at competitive prices but you also find the latest products available on the market! You can find all our favorite Craft Supplies Over Here!
MORE EASY CRAFTS
Did you have FUN with Project 1 of Easy Crafts For Kids? We value your opinion please let us know if you think this specific craft and the instructions were useful to you over here! Remember to mention the page or craft type you refer to.
PREVIOUS EASY CRAFTS FOR KIDS PROJECTS
Easy Owl Mask | Make Pretty Paper |
Create A Craft Toolbox For Kids |
Make Shiny Fish | Cute Pebble Crafts |
Easy Picture Frames | Kids Scrapbook |
Potato Prints | Adorable Ladybugs |
Pebble Jewelry | Eraser Prints |
Fun Paint Recipes | Fun With Felt Creations |
Objects With Shapes | Fun With Shapes |
Make Beads For Jewelry Making |
FUN PRODUCTS
Our recommendations make it easy to find the perfect fun products. There are more than 30 categories. Click on any image below to view.
* As an Amazon Associate, we earn a small commission at no extra cost to you, on qualifying products.
- Home
- Easy Crafts
- Embossing
